
Renders Vs Reality
- Jul 28, 2019
- 4 min read
Work has continued and the drive is now complete, the blocks are all laid and filled with stone chips....

It's steep and it is long - but I have seen steeper drives! Alyson and Chris, I'm thinking of your mountain! The drive turns to go around the house and this provides a turning point so one can drive in and drive out easily.

This leads to the log-store for easy off-loading and gives vehicle access for gardening supplies for the vegetable and herb garden, to the sheltered side of the house.

A picture from the agricultural part of the drive - the paved area extends down to the wall (under construction) and a sloping reinforced concrete ramp allows tractors to enter the field (and yes, I measured the width of a Massey Ferguson - it will fit through the opening in the wall :)
Meanwhile, the building contractor has been along and inspected and sorted nearly all of the items from the snagging list, which included some paintwork, tidying of edges and removal of some remaining cement from the floor tiles. It's not perfect, but 99.5% acceptable. And really now, with all the furnishings in place, it is difficult to do more.
Still to attend to is the fitting of a U-bend under the bathroom sink. Believe me... this is needed! Currently a flexible pipe is fitted, formed roughly into the shape of a U-bend - but it does not provide a 100% trap. But space is tight under the sink unit, so a special small fitting is being sought.
The landscaping guys have been back after a layoff last week. So work has almost been completed on the side wall with planters, and some strimming has been done to investigate what is under the vegetation!
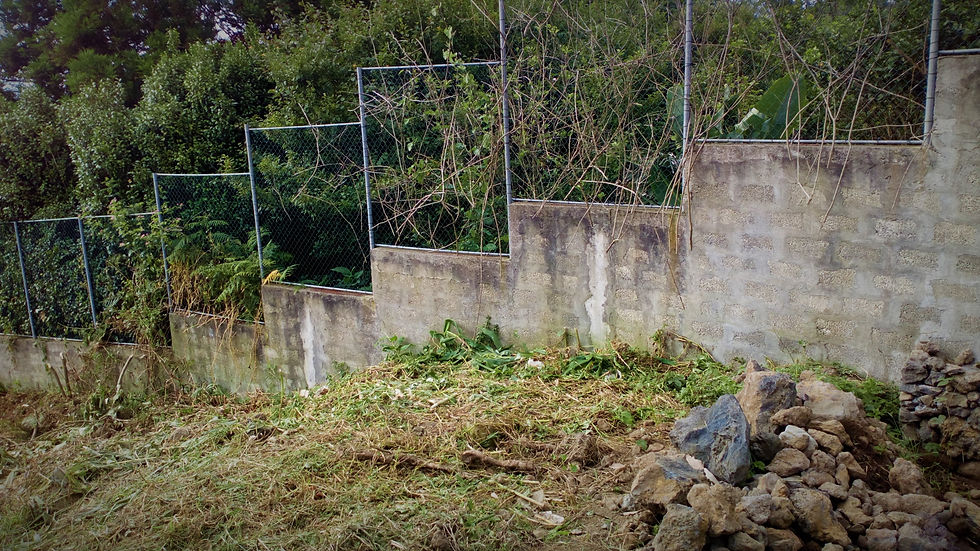
It was a shame, in a way, to see a substantial cutback of the wild growth in the area just below where the raised bed planters will go (approximately where the pile of stones are on the right of the image). However, clearance was needed to see what lay underneath, and how far the little garden can extend to. When works are complete the wild flowers, fruits and vegetables will return on the steep slope. The wall and horrible fence will be covered with vines. Thank god.

The stone wall is all but finished and serves several purposes: It importantly repairs the foundations of this wall (although it belongs to next door I don't want it falling down!), it looks good and it has planters on the top at each level to plant vines, cascading ferns and the like. All the stone in this wall was recovered from the plot, washed and then concreted into place. A small pile of rocks remain, and these will be used to define the area.

On the entrance side of the house the gated wall to the field has continued and is looking very good, and will eventually tie the house into the landscape, as can be seen in the photo above.
On the drive the planter holes have been dug out to receive soil and plants / vines: A type of vine has been shown to me by Rob, the gardener, that grows very quickly and offers 100% coverage of a wall. So, this will save the need to render or paint any of the 'rustic' / 'industrial' looking walls that bound the drive and side vegetable garden.
______________________________________________________________________
Renders vs Reality
As mentioned in the last post, this blog edition is going to take a look at the renders in comparison to the reality of the build. How close where my renders? How does it look, now 'finished', compared to the vision?
The House - Exterior

The original 'Final Render' of the porch...

The final outcome …. note shutters dropped to save money.

The patio render.

And it loos like this: No bar at the kitchen window as the sill is deep enough to put drinks on, addition of a small washing line (which can easily be removed) was not on the plan!
Interior:

The bedroom render - very colourful...

Just white! Window dressing still to hang. The red headboard can not be seen in shot, but is there.

Open Plan area finished render...

Picture was tricky due to light and mobile camera limitations - so I had to make it look 'arty' - but yep, all good, all present and correct. Apart from the red pillars - not needed, as enough colour, and enough red already.

The render before the fireplace was designed!

And here's the reality: Fire surround designed by my good friend Alan Woodward, sets off the stove brilliantly. Surround also protects the TV and Computer from heat. The mirror looked better rotated through 90 degrees... TV on shelf rather than on the wall - purely practical, as hanging the TV on plasterboard is not a good idea.

Upstairs studio render... this area was always going to be a bit of a mystery until I arrived on site with the equipment... but...

This is how it looks. OK. Spot on. Yes, I sit on the floor to make music! Back in the day, when I was making 'banging beats' (LOL), I always used to stand to work (so I could 'dance')... but I'm a bit long in the tooth now, so the floor is good.
So, in conclusion, I'm very happy that it all looks as initially envisaged. I used 'Chief Architect' to plan, design and render my ideas; a super tool and one I would recommend to anyone undertaking a build project. I did not use the full 'pro version' (which has photo-real rendering) because it runs to thousands of pounds, but instead I used the semi-pro version - good enough I think.

I had to post this shot; nice blue against green grass :) Plenty still to do.... the story continues....
Still the garden, under-house area, and other jobs to do, so stay tuned as the outside is changed from a construction site to a proper 'house and grounds'.
There is also a housewarming party to organise once all the final paperwork is completed!
Next Up: Should you, can you?


Comments